Imaging Process
Connect all the things.
Connect the laptop to power and to the imaging network, then make sure the laptop is fully shut down.
At Indianapolis HQ, be sure to use the USB-C to 2.5GbE adapters for all laptops except P50 and P52S.
Boot the laptop to PXE.
Context for the Curious
When a computer turns on, it needs something to "boot to". Normally, this is a hard drive or SSD in the computer. Since imaging a computer means wiping the dive and writing new data to it, the drive cannot be the thing that is booted for imaging. "PXE" stands for "pre-execution environment". Think of a PXE as a minimal version of Windows that is purpose-built to do a very particular and specific thing. This means it's very small as operating systems go. It being small means it can be served over a network rather than from a hard drive or USB stick connected to the computer.
The imaging server hosts an Acronis PXE on the imaging network. When we perform this step, we are telling the laptop to look on the network for a PXE to load. On the imaging network, the imaging server provides the Acronis PXE that we need for imaging.
But what do I do?
Press the power button on the laptop and wait up to about thirty seconds. As soon as you see something on the laptop screen, press F12 to bring up the boot menu. When you are presented with a list of options, select the one that says either PXE or LAN; the exact wording will vary slightly for different models of laptop.
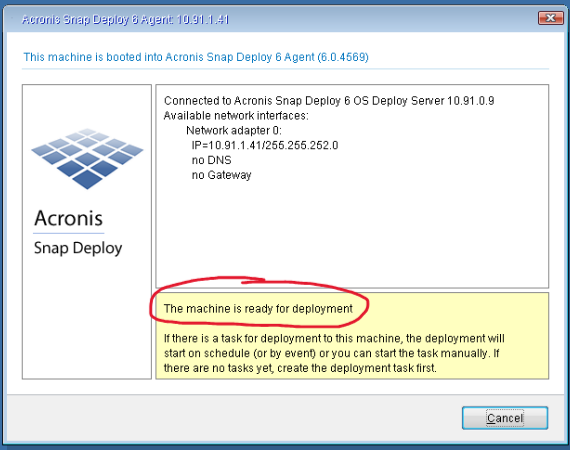
After some load time, you should see a window on the laptop screen saying "This machine is ready for deployment."
Run a deployment task.
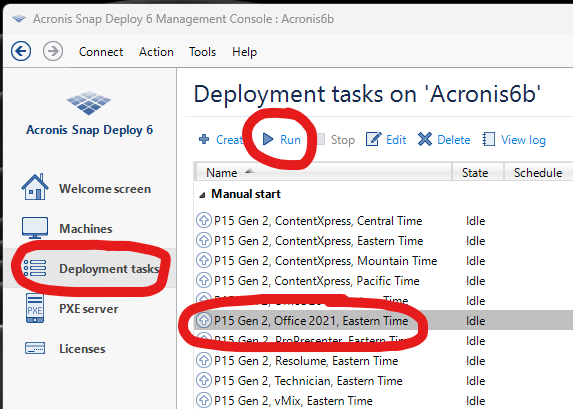
This is the part where we interact directly with the imaging server. You should see a user account that corresponds to your location. Sign into that user account, open Snap Deploy Management Console, go to Deployment tasks in the left sidebar, select the task you wish to run, then click Run.
The laptop will display a progress bar that advances as the image file from the imaging server is written to the hard drive in the laptop.
Activation Script
Once the progress bar completes, the laptop will reboot itself automatically. Once it reaches a Windows desktop, you will see a command line window with a Markey's logo. We call this the "activation script" because it gets an activation license for Windows and for Office. It also sets the system time and downloads the Apps folder from the imaging server.
When the script is complete and has done its job, you will see a green message saying it's done.

If you do not see a green success message, YOUR LAPTOP IS NOT SHOW-READY. Please email helpdesk@markeys.com if the script stops on anything other than the green success message.
The activation script will continue running automatically every time the computer starts until it is able to complete. The last thing the script does before saying it's done is flip a switch to stop itself from running automatically on startup.
Done.
Congratulations, you have imaged a laptop!
If you selected a ProPresenter or vMix image, additional steps are needed in order to activate that software.