How to Produce Good Audio in Zoom
Zoom has a built-in assumption that most people are using low-quality built-in laptop microphones and speakers. To combat the terrible noise and feedback that would ordinarily be caused by this scenario, Zoom automatically performs some audio processing on incoming audio signals.
We are not Zoom's typical user. Often, the audio feed we are sending to Zoom is coming out of an audio console that has already processed the sound to exactly what we want it to be. In this case, Zoom's extra audio processing makes our audio sound worse to virtual audiences.
Some extra steps are required to tell Zoom not to perform any additional processing on your audio signal because what you're sending it is already good.
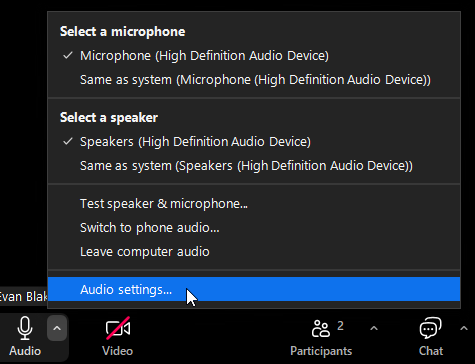
1. Open Zoom's audio settings.
After connecting to audio in a Meeting/Webinar, click the up arrow next to the mute button and click "Audio settings..."
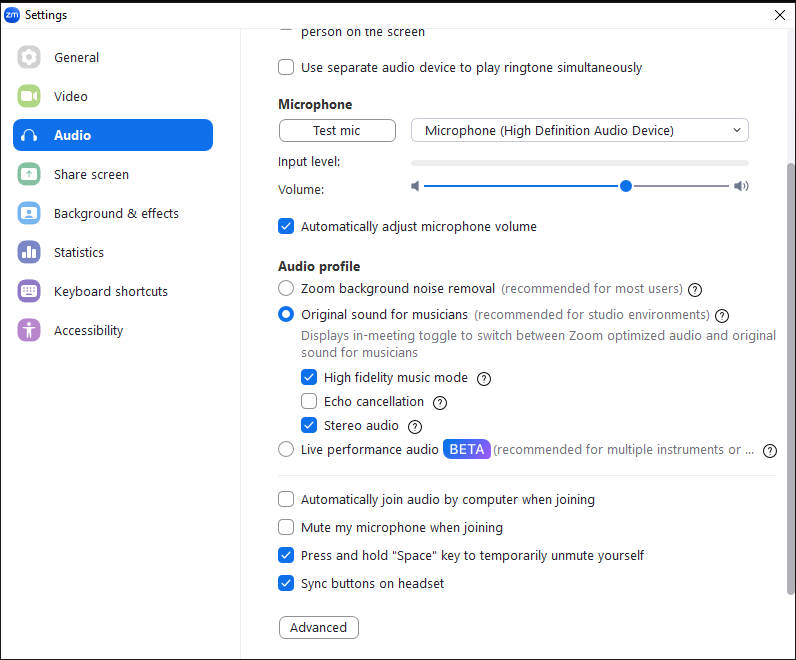
2. Set "Original Sound" settings.
Scroll down to the "Audio Profile" section and select "Original sound for musicians". Turn on "High fidelity music mode", turn off "Echo cancellation", and select "Stereo audio" depending on your setup. It's true shows are usually produced in mono, but enabling stereo can still make a noticeable difference for videos and music. As a rule of thumb: enable stereo if your audio signal is coming over USB from something like a Roland switcher; leave it off if your audio signal is coming over XLR through something like a Shure x2U.
3. Enable the audio profile you just created.
After setting all this up, you still haven't actually enabled this audio mode. To make the switch, go back to the main Meeting/Webinar window. Near the top right, next to the speaker/gallery view button, you will see the button to turn on "Original sound for musicians". Once this is on, then you are sending good, clean audio to your virtual attendees.
