Quick Start
The columns have been designed in such a way that you can loop them over truss and tighten them around a light fixture. Once attached to your rig, you can raise them directly out of the cases without having to do any manual lifting, except for the final few segments. Once your rig is at height, you can pull the remainder from the case, and carefully arrange it around a light on the floor. Be aware that the fabric could bunch and obstruct fans on the lights. There is a slit in the fabric at one corner, so be sure to not have that corner facing your audience.
Light these from the top, bottom, or both. Both is best for full effect, but if your client balks at the price, encourage them to consider a single light and call it "ombre". Make them feel like they're not sacrificing anything by only choosing a single fixture per column.
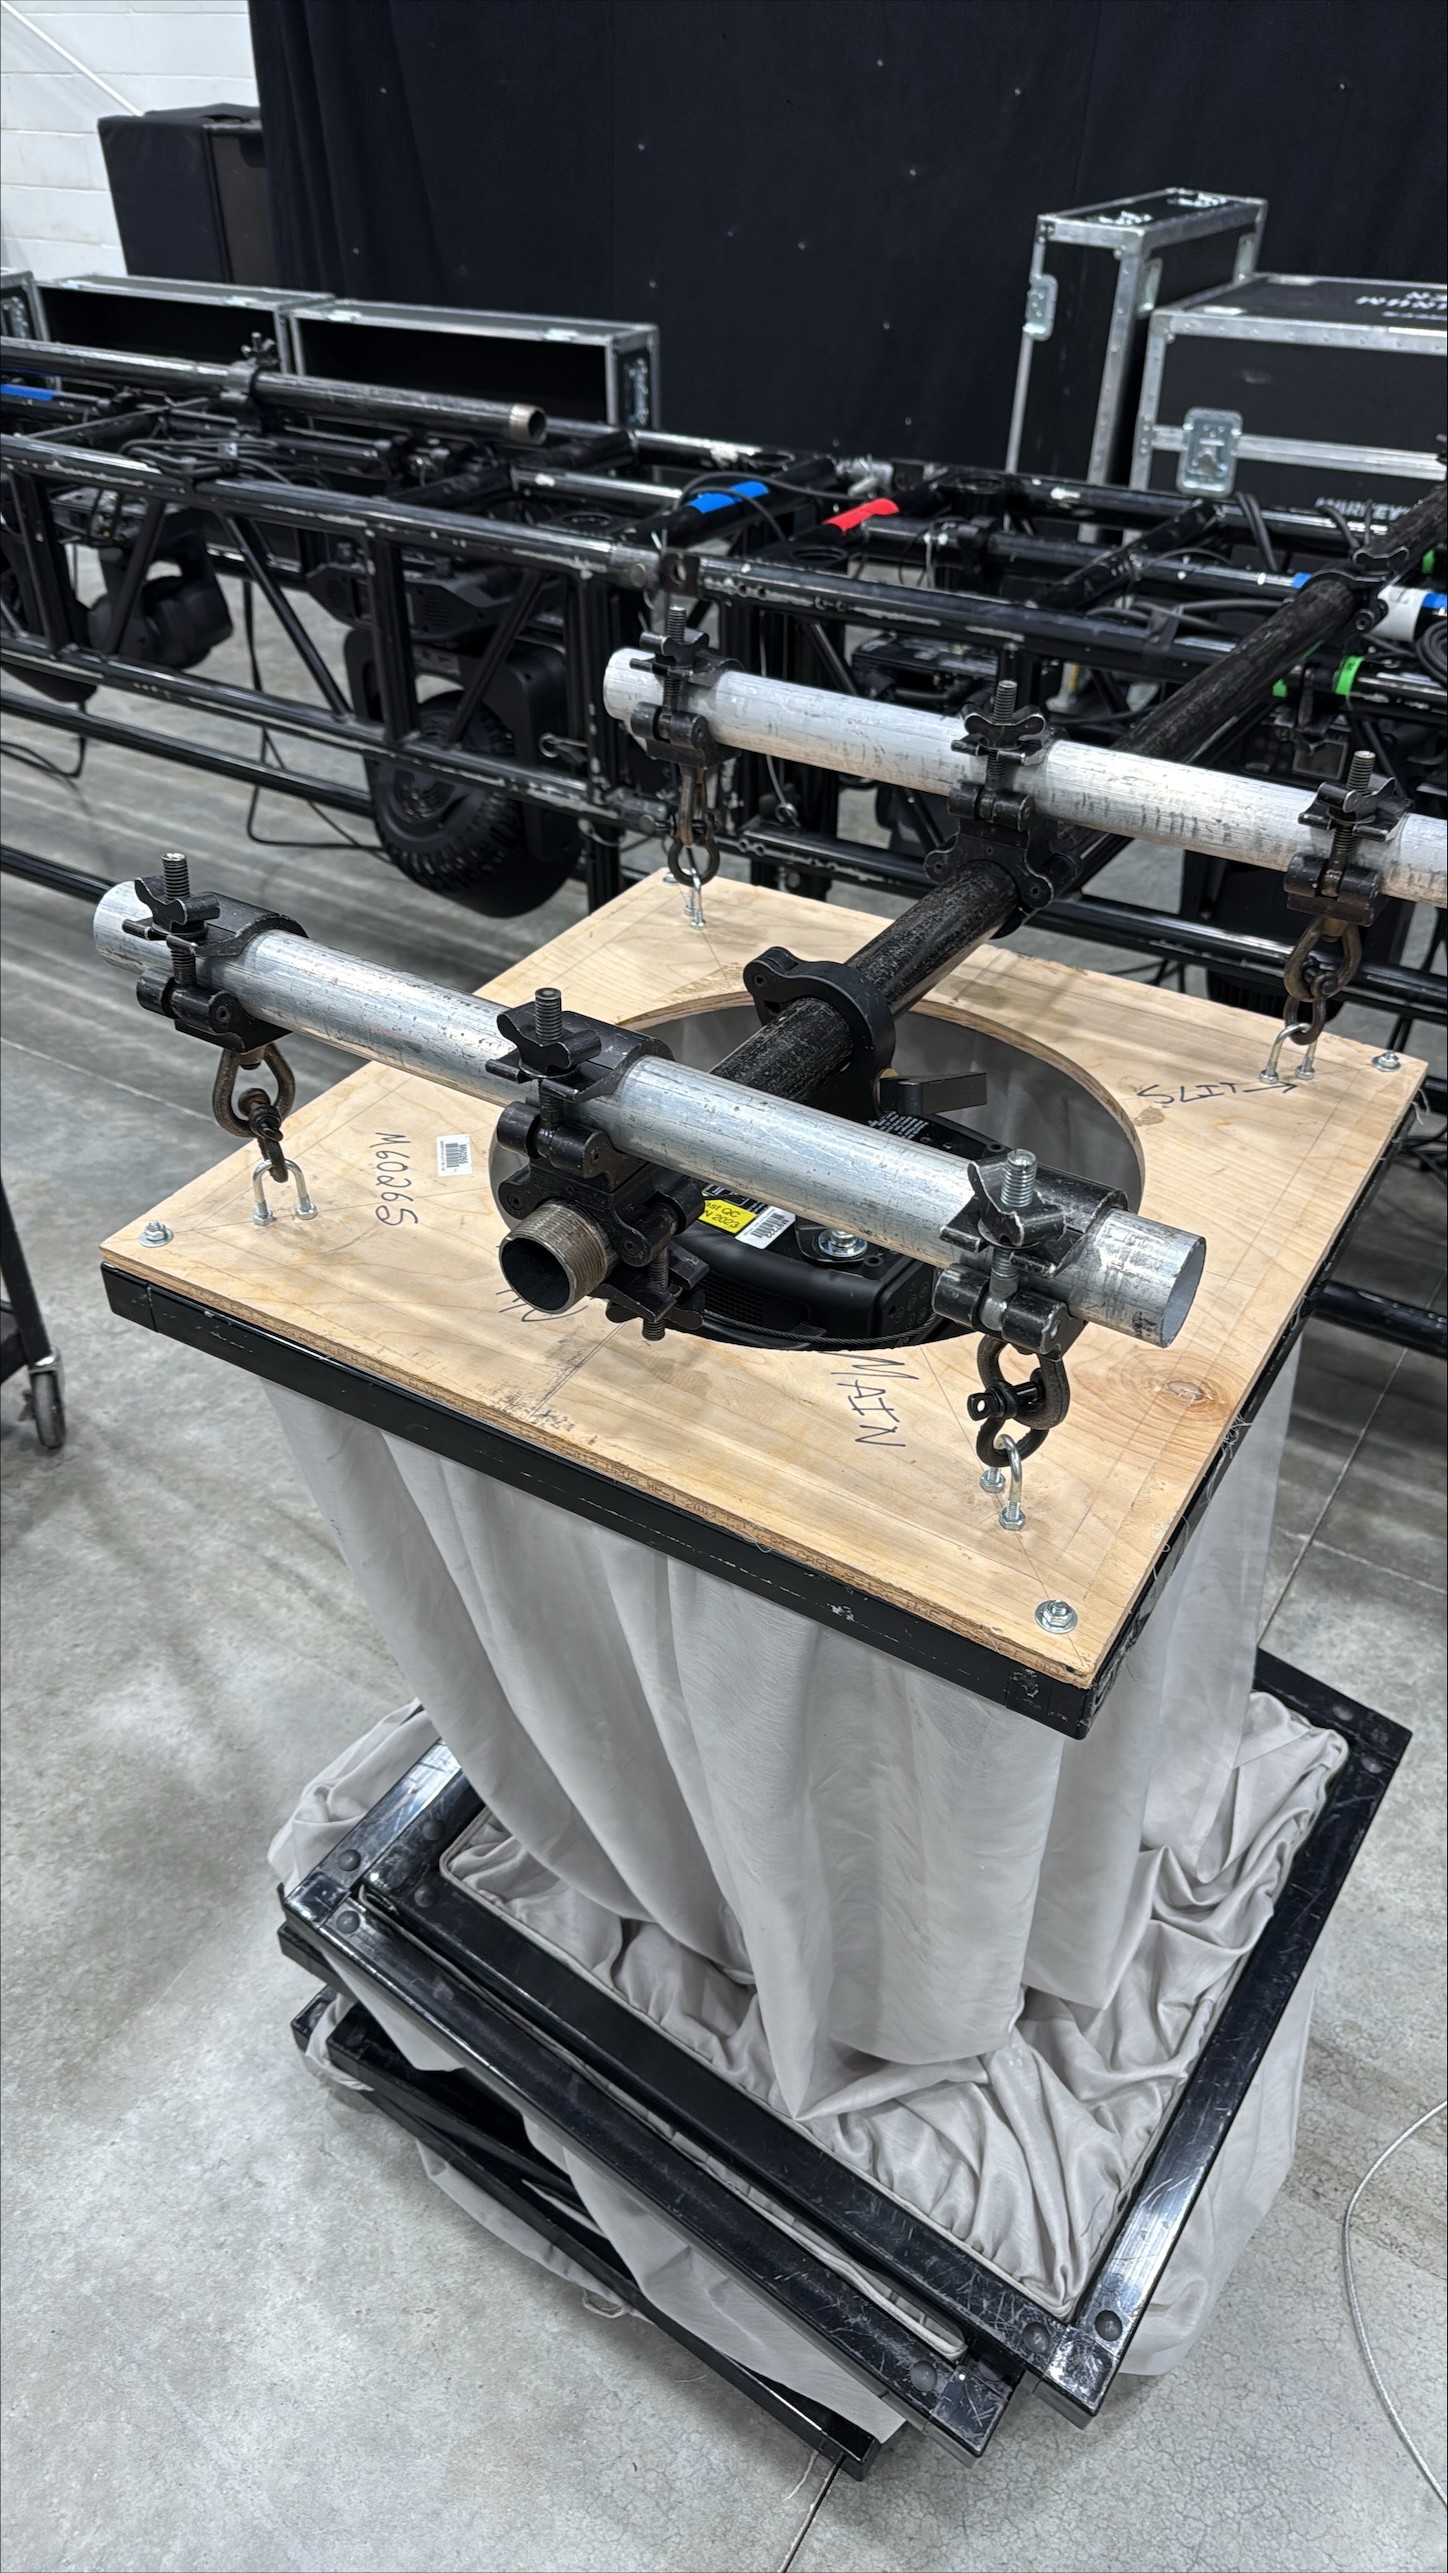
They are 2' squares, with a plywood cap at the top which has a U-bolt at every corner spaced at 18" so you can attach it directly to 18" truss or two battens using mega-clamps with eyebolts. The kit should ship with the four clamps and matching shackles, plus the two aluminum battens and fixed 90 cheeseboroughs.
The hole in the top has been checked to fit up to a Rayzor 760 and accommodate its full range of motion and effects, although you won't benefit from any effects other than color, gobo, and iris. I recommend not deploying these shorter than 27' from floor to bottom of truss. Too much of the extra fabric and frame pieces will pile up on the floor, and no matter how neatly you stack, you'll still have a pile. Additionally, if you put a light in the bottom, you'll start to push fabric into the intake/outtake fans of the light, potentially causing a fire hazard.
The fabric does not have a fire safety rating, and I cannot obtain it. It was a Joann fabrics product and even before they closed they didn't keep that kind of documentation on-hand. Bear that in mind if your site requires such certification.
If you rig this directly to truss, you may find it difficult to center a light inside at the top, but you can still place one at the bottom. If you want to ensure a light is in the top, try rigging off the front or back of truss. To do so, you'll want at least 4' of schedule 40 set at 90 degrees, fixed with cheeseboroughs. You can then hang the light from that pipe and fit the aluminum battens on either side, as shown below. Be aware of the tilt if you don't spread them evenly forward and rearward. I would guess, though, that an equal weight of a sandbag or a chain-motor bag safely secured to the opposite side of the column would accomplish that. I haven't come up with the safest way to do that, other than using another column.