Skip to main content
Setting for App Control
-
Turn on and reset your fixtures through the fixture display.
-
Open your Astera App.
-
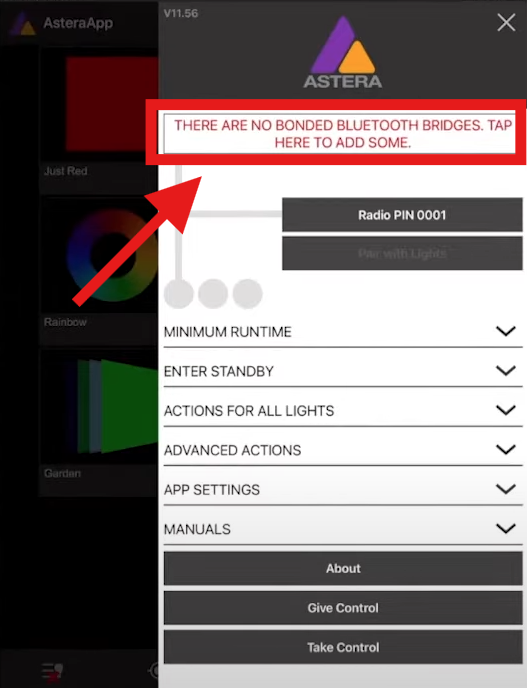
Add a Bluetooth Bridge.
a. Tap the 3 Lines on the top right of the app.
b. Tap the message at the top of the screen that says THERE ARE NO BLUETOOTH BRIDGES. TAP HERE TO ADD SOME. 
c. Select the option to add an AsteraBox.
d. Turn on your AsteraBox. The blue APP indicator light should be blinking.
e. Press Yes on the App’s pop-up menu and a bridge should populate on the screen.
f. Choose to bond with your device, verifying your AsteraBox and finding its pairing pin on its back.
g. The AsteraBox will now appear under My Bridges.
-
Change your radio pin from 0000 and remember your pin when setting multiple AsteraBox wireless zones.
a. Press Radio PIN XXXX under the AsteraBox status bar.
b. Set a new 4-digit value in the pop-up window and tap OK.
-
Pair your lights through the app.
a. On each fixture, hold down the power button until it flashes blue, indicating that it is in pairing mode. This can be done while lights are still in their case.
b. Tap Pair with Lights under the AsteraBox status bar. 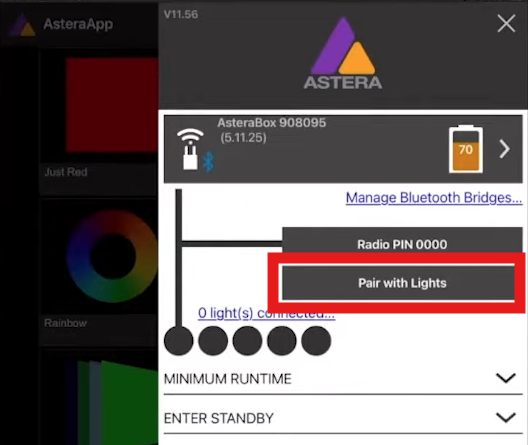
c. The app will show a status bar while it searches for fixtures to pair with. This bar indicates a pre-determined set of time, not the completed pairing of all devices, so you may need to run Pair with Lights multiple times.
d. If lights do not pair, unbond Bluetooth through the onboard display and try again.
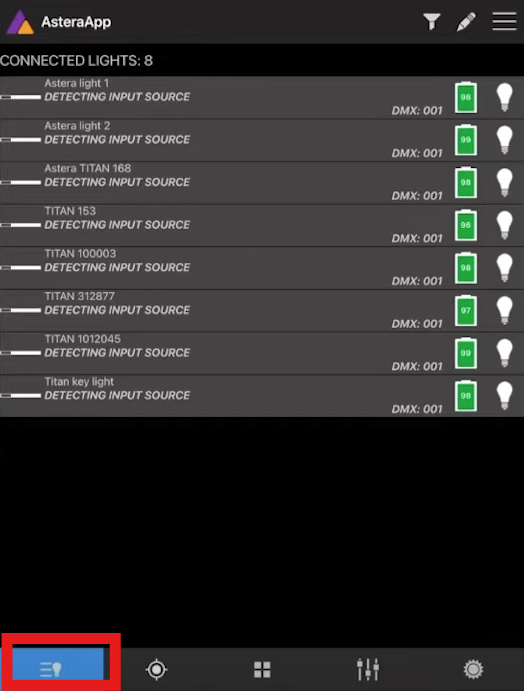
e. Your lights will populate in the Lights List page. 
-
Set your battery settings/brightness.
a. Tap the 3 Lines on the top right of the app.
b. Scroll down to and choose Minimum Runtime.
c. In the drop-down menu, scroll left and right to choose your minimum runtime.
d. MAX indicates maximum brightness, therefore less runtime.
-
Create Groups.
a. Navigate to the Target page.
b. Press the + on the top right corner to create sync sets, flow sets, or individual light targets.
c. Once you have chosen your group type, follow the app onscreen instructions for adding your fixtures.
d. You can add a fixture to your group either by selecting Enter on each specific fixture or by tapping the bar that says To add lights press their ON/OFF (or ENTER) button,button, which will lead you to the list of paired lights. Highlight fixtures by tapping them, then press OK to add them.
e. Rename your group.
-
Create Effects.
a. Navigate over to the middle tab to reach the Effect pages.
b. You can scroll through this page to view pre-built effects.
c. Navigate to the next tab to the right to enter the Editing page.
d. Change various effect attributes.
e. To overwrite the preset effects, press the save icon on the top of this page.
f. To create a new effect, navigate to the Effect Pages and press the + on the top of the screen.